I treasure all things “fall” and Thanksgiving is my favorite holiday. But I’m also aware that December is a short month and I welcome all things “Christmas”, too! Enter, the 12 Days of Projects. I’m going to get a jump on Christmas decorating (and maybe some more fall decorating) and challenge myself to do 12 handmade projects in 12 days so that by Thanksgiving, I’ll be ready to get started on Christmas decorating! Some of these may even be items I sell for psbonjour at my friend, Elisa’s store, Moonstruck – grand opening December 6! I’m going to do one post and add to it each day. Let’s get started!
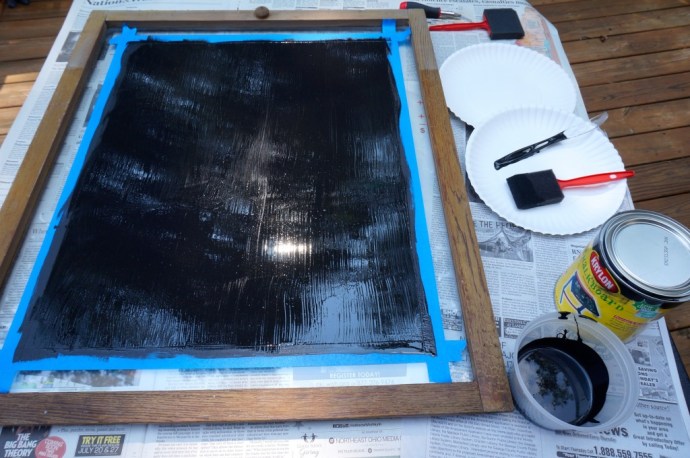
So chalkboard paint (not to be confused with “chalk paint”) has been popular for awhile. It’s very easy to use and it’s fun to use it on a surface you know you will want to keep changing up. As I like to say “chalkboard paint, not just for schoolteachers anymore”. Anyhooo, today we are using chalkboard paint on an old window I picked up from City Salvage. I just liked the idea of keeping a border around the chalkboard area to let more light shine through. And I wanted to use an old window instead of buying a new one or creating some new surface. I like that I can prop it up on a table in the kitchen or hang it on a wall in the dining room if I want.
Materials:
Chalkboard paint – I used Krylon brand
Foam brush
Painter’s tape
Window
Instructions:
Tape off the area you want to paint – I measured and allowed for a 2-inch border around the frame.

Paint the chalkboard paint on the area desired. I used a single direction brush stroke.

Wait until the paint is mostly dry and then paint another layer with brush strokes going in the opposite direction. This will allow the paint to be a smoother surface for writing.
Let the paint dry thoroughly according to directions (~3 hours).

“Cure the paint” by rubbing the surface with chalk, letting it sit for 24 hours, and then wiping off with a damp rag.

Write something clever or draw pretty pictures, it’s all up to you!


6 Comments
I love this idea. I may have to steal it and possibly use it for “handmade” Christmas gifts this year.
November 16, 2014 at 10:57 pmCool! So many options with the surface, too. The window frame could be painted, you could use a paned window, it could be rectangle/oval, etc. Lots of options to try!
November 17, 2014 at 1:31 pmI love this!! Must do!!
November 17, 2014 at 1:49 amFantastic!
November 18, 2014 at 12:19 pm[…] forward to getting more stuff done, woot! If you haven’t already, I invite you to check out Day 1 Chalkboard Window and Day 2 DIY Mercury Glass. And then join me back here for Day […]
November 18, 2014 at 10:19 pm[…] Day 1 – Chalkboard Window […]
November 20, 2014 at 7:29 pm