Search results for:

chalkboard

In Life

12 Days of Projects – Day 1 Chalkboard Window

I treasure all things “fall” and Thanksgiving is my favorite holiday. But I’m also aware that December is a short month and I welcome all things “Christmas”, too! Enter, the 12 Days of Projects. I’m going to get a jump on Christmas decorating (and maybe some more fall decorating) and challenge myself to do 12 handmade projects in 12 days so that by Thanksgiving, I’ll be ready to get started on Christmas decorating! Some of these may even be items I sell for psbonjour at my friend, Elisa’s store, Moonstruck – grand opening December 6! I’m going to do one post and add to it each day. Let’s get started!

So chalkboard paint (not to be confused with “chalk paint”) has been popular for awhile.  It’s very easy to use and it’s fun to use it on a surface you know you will want to keep changing up.  As I like to say “chalkboard paint, not just for schoolteachers anymore”.  Anyhooo, today we are using chalkboard paint on an old window I picked up from City Salvage.  I just liked the idea of keeping a border around the chalkboard area to let more light shine through.  And I wanted to use an old window instead of buying a new one or creating some new surface.  I like that I can prop it up on a table in the kitchen or hang it on a wall in the dining room if I want.

Materials:
Chalkboard paint – I used Krylon brand
Foam brush
Painter’s tape
Window

Instructions:
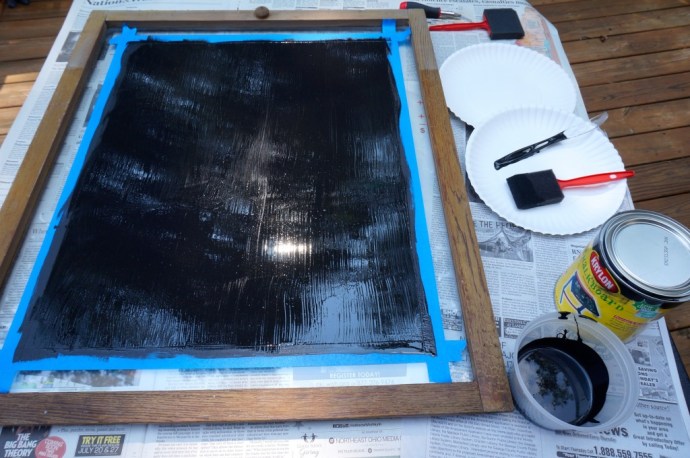
Tape off the area you want to paint – I measured and allowed for a 2-inch border around the frame.
DSC01899

Paint the chalkboard paint on the area desired. I used a single direction brush stroke.
DSC01900-EDIT

Wait until the paint is mostly dry and then paint another layer with brush strokes going in the opposite direction. This will allow the paint to be a smoother surface for writing.

Let the paint dry thoroughly according to directions (~3 hours).
DSC01902

“Cure the paint” by rubbing the surface with chalk, letting it sit for 24 hours, and then wiping off with a damp rag.
Photo Nov 15, 1 59 27 PM

Write something clever or draw pretty pictures, it’s all up to you!
Photo Nov 16, 10 01 32 AM
Photo Nov 16, 10 01 04 AM

In Life

5 Fun and Simple Ideas for Fall Decor

I’m sure every other person out there is already on Christmas decorations, but I always feel like fall and Thanksgiving don’t get proper attention. Plus, I’m a bit of a procrastinator so I don’t always get my decorating done until after the season has started! 😉 So here we go…

Read more

In Life

12 Days of Projects – Day 5 Decoupage Coasters

Day 5 of “12 Days of Projects” and I am onto decoupaging! Some of the projects I’ve tackled are definitely easier/harder than others and I must admit, decoupaging has been a challenge for me at times. I suppose it’s not a challenge for a fun little art project that uses strips of paper and is very freeform like we all did in grade school. But it becomes a bear more when I want to do something precise, like round glass coasters. And I want the image or pattern to appear through the other side. I definitely have not perfected it, but will have fun trying. 🙂 I saw this cute Christmasy plaid paper and thought these would be a nifty little holiday project…here we go!

Materials:
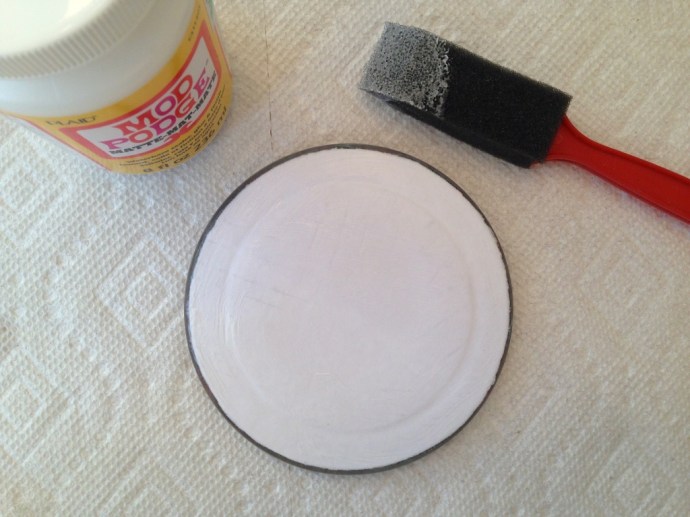
Decoupage glue like ModPodge
Brush (I used a cheap foam craft brush)
Scissors
Paper (I used decorative paper)
Coasters (I got these from Ikea)
Xacto knife
Sandpaper (I used 220 grit)
Sharpie/black paint pen
Felt
Spray adhesive

Photo Nov 18, 8 31 32 AM
Instructions:
Step 1. Make a template or just cut the paper into circles around your glass coasters. It helps to get as close to the size you’ll want for your piece but we can do some trimming later, too.
Step 2. Brush a light layer of ModPodge on the underside of the coaster and on the pattern side of the paper. Lay the paper down on the glass, glue sides together, and position it before the glue sets (sorry for blurry pic, no time for a retake!)
Photo Nov 18, 8 58 00 AM
Step 3. Use some type of flat tool (i.e., a credit card or a Pampered Chef scraper or a plant marker) to “push” out any excess ModPodge from the center to the edge of the paper. This is where I have varying success and the art to decoupaging really comes in. If you push too hard, you can get streaks where you remove too much glue. If you get shiny spots, apparently that means too much glue. I’m sure if I did this every day I might get it right?!
Photo Nov 18, 9 05 26 AM
Step 4. Now comes the easy/hard part – let it dry for 15-20 minutes minimum. Set your timer and go pour another cup of coffee, get on some time-wasting social media site, etc. 🙂
Step 5. With the first layer of glue set, now you can trim the edges with an xacto knife (make sure it’s sharp or you will get tears in your paper). Then sand the piece lightly and perpendicular to the edges so that you won’t have any broken seams of the paper to the glass. Wipe off thoroughly.
Photo Nov 18, 9 28 05 AM
Step 6. Apply another thin layer of ModPodge to the underside of the coaster as a finishing coat. Let dry completely (15-20 min) and then lightly sand again.
Photo Nov 18, 9 30 27 AM
Step 7. Because I want to use these as drink coasters where they might be on a wood coffee table, I decided to protect the underside with black felt. I cut circles a little smaller than the coasters and then covered the white underside of the paper edges with Sharpie marker. I used spray adhesive to adhere the felt to the back of the coasters.
Photo Nov 19, 9 43 56 AM

Photo Nov 19, 9 45 56 AM

Photo Nov 19, 9 49 34 AM

Et voilå, glass coasters with a fun Christmasy plaid background! And hey, if you haven’t already, take a gander at the projects under the ‘ol belt so far…

In Life

12 Days of Projects – Day 4 Holiday Wreath

We are now on Day 4 of my 12 Days of Projects to celebrate Thanksgiving and get ready for Christmas. By 4 can I say I’m on a “roll”, ha! I don’t know, but I’m having a good time and looking forward to sharing more ideas with you. Check out the first 3 days: Chalkboard Window, DIY Mercury Glass, Holiday Banner. And now, on to Day 4…

I have friends and relatives who truly excel at the art of flower arranging and take it to another level. But I have some ideas for wreaths and decided to give it a go for Christmas this year. There are so many fun variations of wreaths – you could use ornaments, grapevine wreath, fabric. I chose to use good ‘ol fake greenery (I also LOVE real greenery!) and add some embellishments. Here’s what you’ll need to get started:

  • wreath forms – I got these from Walmart, the basic evergreen wreath and tacked two together to get more fullness
  • picks and embellishments – I used some ornaments, bows, and picks (always wondered why they are called this and I guess the etymology is around picking flowers as they are essentially pieces/parts of flowers and plants)
  • floral wire or twist ties

Now for the so simple instructions! Decide on your layout and design. Begin attaching picks and embellishments in a layered manner if you want some pieces to overlap each other. For example, I wanted to use green leaves to give the evergreen some depth, so I attached all of those first and then attached the embellishments, bow, and ornaments last.
Photo Nov 18, 12 54 44 PM
Photo Nov 18, 12 56 07 PM

Some ornaments and picks will be on wire stems and you can just use this to attach to the wreath or the floral wire. I even found some attached to little clips so you can easily clip onto the evergreen stems in your wreath.
Photo Nov 18, 12 58 08 PM
Photo Nov 18, 12 59 46 PM
Photo Nov 18, 12 57 37 PM

If you want to mix in some live foliage, you can really create a beautiful wreath. You just have to be aware and either remove it at the end of the season or live with a sad, half-dead wreath the next year. 🙁 But what’s also super fantastic about these wreaths is that you can start over very simply or change out the design every year!

Have fun – happy creating!

In Life

12 Days of Projects – Day 3 Holiday Banner

Hi, friends!  It’s Day 3 of my 12 Days of Projects to celebrate Thanksgiving and get ready for Christmas.  I’m glad I got started and am looking forward to getting more stuff done, woot!  If you haven’t already, I invite you to check out Day 1 Chalkboard Window and Day 2 DIY Mercury Glass. And then join me back here for Day 3…

Don’t you just love all the buntings and banners and pennants everywhere right now? I feel like I want to make one for every event, holiday, etc. I displayed this one in my recent Fall House Tour. This might be the easiest project of the 12 if you use my template! Or you can let your creativity flow and try something different.

I created the pattern on my computer so it could fit all on one page and then printed it on card stock Kraft paper (I am not a hand-lettering type of gal, so I try to find ways to create on my computer and then print out – download free printable here). I then cut out each piece and punched holes, threaded it with twine, and attached it to the side of the window and painting frames with tape (could also use thumbtacks).  So easy!

There are really endless variations for this project including the words, the shapes/sizes of the pieces, the font, the hanging technique in addition to layering on other shapes or including other embellishments. Go crazy and have fun!

Oh, and squirrel!  …thinking of twine makes me think of the World’s Largest Ball of Twine that I do so want to visit some day, ha!  🙂
Photo Nov 02, 3 21 19 PM
Photo Nov 02, 3 21 42 PM